ihakimi now allows users to have real-time back and forth calling functionality using OpenAI’s new realtime API. Using this you will be able to handle both inbound as well as outbound calls automatically using Voice AI Agents.
This new feature retails all the previous features of the Voice Channel inside ihakimi and adds more functionality making the voice channel by ihakimi the best in the market.
In order to get started, we will be needing a few things:
- OpenAI connected to your workspace (currently only openAI is supported for voice)
- Active Twilio integration and number available
- Voice bot connected to the active Twilio number
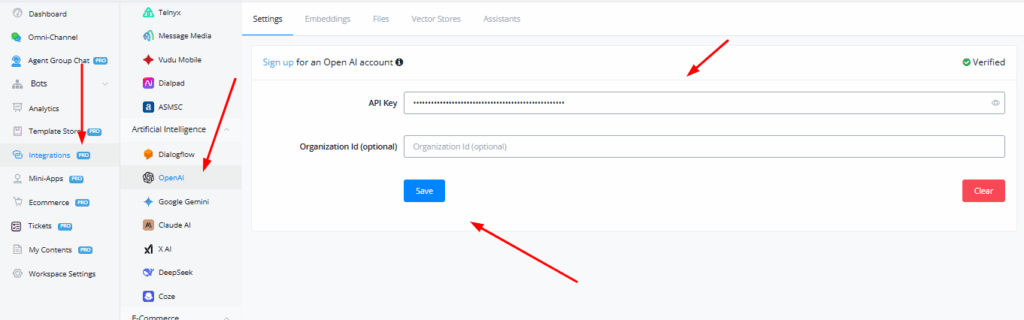
Integrating OpenAI With ihakimi
You can integrate OpenAI with ihakimi by going into the “Integrations” tab from your workspace’s dashboard and clicking on “OpenAI” under the Artificial Intelligence tab
Integrating Twilio With ihakimi
Similarly you can connect twilio and add a phone number inside the Integrations tab from your workspace’s dashboard.
The Voice bot is simply an automated voice response to calls and messages that streamlines the way customers interact with a company. It has been proven to be a vital tool in various businesses. Use Cases Customer Service: Voice Bot assists customers by providing automated responses to common questions. Appointment Scheduling: People can use Voice
Creating & Using Voice AI Agents
Similar to all text-based channels, the ai agents inside the voice channel are created using the same logic and built.
ihakimi has introduced its powerful AI Agents feature, making it easier than ever to build AI-enabled chatbots without the complexity of handling chat completions and AI assistants manually. With AI Agents, users can now create advanced, conversational AI bots that seamlessly integrate with OpenAI (and all other popular GenAI platforms), execute task
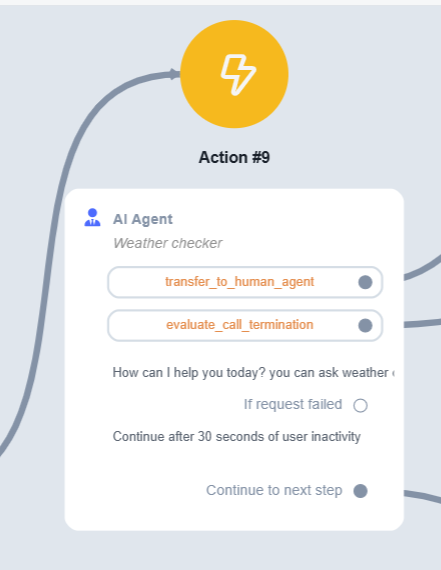
Inside the subflow, create an AI Agent node and connect it to the Start node. Make sure you make this subflow the mainflow or connect the agent inside the mainflow.
Select the agent from primary agent drop down menu and rest of the settings are similar to that of AI Agents built in other channels
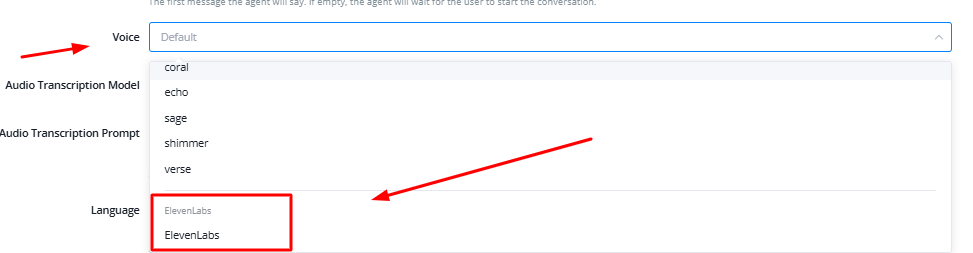
The “first message” field is the text that the Agent speaks when the call is first connected with the user, if the field is left empty, the agent will wait for the user to start saying something

From the voice tab, you can select default voice set provided by OpenAI to further customize your agent

You can also select a specific model for transcription as well as provide more context in the prompt related to the call.
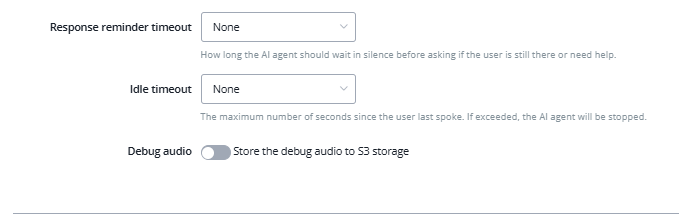
You can also set the response timeout and idle timeout time in order to further streamline the experience.
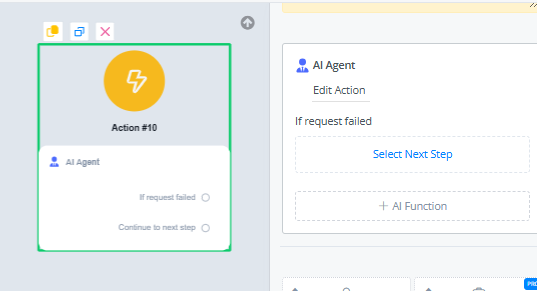
You can further increase the functionality of the agent by triggering different subflows or logic depending on the function call
Eleven Labs Integration & Voice Use
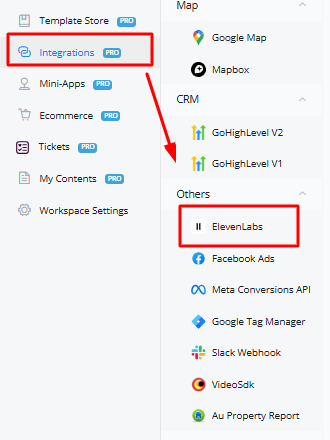
To integrate Eleven labs, go to integrations tab from the workspace dashboard
Eleven labs integration will allow you to use your custom voices with the realtime model. In order to switch over to your voice, copy the Voice ID from inside your Eleven Labs dashboard and then select Eleven Labs from the dropdown
Now paste the voice ID in the field below

Now the AI Agent will use your custom voice.
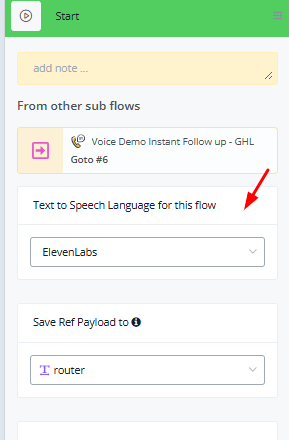
You can also set this default at subflow level, by configuring it inside the Start node
Recordings & Other Settings
In order to set the default voice from Eleven Labs for all flows, you can set the voice ID inside the settings of the bot
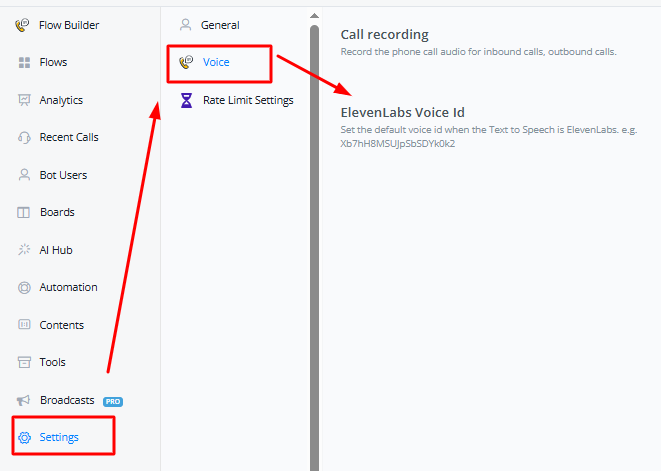
Other than this, you can also set the settings for recording of the voice calls.
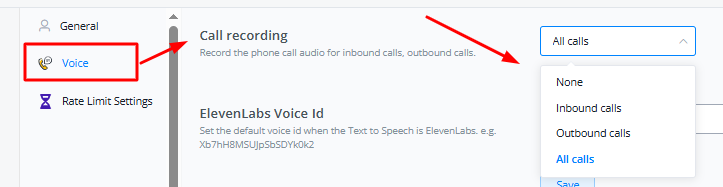
You have four settings in here:
None – We will not record anything
Inbound Calls – We will only record incoming calls or calls from people calling the bot number
Outbound Calls – We will only record outgoing calls or calls initiated by the bot
All Calls – We will record all the calls


